Introduction
Welcome to the PH Editor Reference Manual. Here, you will find all the information related to the Chart Editor that is included with Project Heartbeat (or PH for short), a Rythm Game inspired by the Project Diva series.
The editor supports both Console (with Doubles, Sustains and Hearts) and Arcade (with Multinotes, Holds and Slides) charting. Mixing both is possible, but discouraged outside of expert use.
Help
If you need help, have any questions, or just want to talk to people about the editor and chart design, feel free to take a look at the Project Heartbeat Discord Server. We are a welcoming community and love to talk about this kind of stuff. Bug Reports and Feature Requests are also appreciated. Your feedback is what makes the game better!
Contributing
The editor is not (currently) open source. However, you can contribute to this guide by opening a Pull Request on Github. You can also contribute to the game by submitting Bug Reports and Feature Requests on Discord
License
This guide is released under the GNU Affero General Public License 3.0. Scripts interacting with the Project Heartbeat API are also automatically licensed under the AGPLv3, alongside a Royalty-Free License for EIRTeam to incorporate it into the game.

Why use the PH editor?
If you already have Project Heartbeat and you are only planning on creating charts for it1, then the PH editor is the obvious choice. However, it is not the only choice. There are other editors which might be a better fit for you, depending on your needs. We provide importing tools for all of these, so you can still use them to publish PH charts.
The following chart outlines the differences between all of these editors. None of them are necessarily "better" than the others, they just fill different roles, so use what suits your needs, or what feels best for you.
| Metric | PH Editor | PPD Editor | Comfy Studio | F2nd edit mode |
|---|---|---|---|---|
| Learning curve2 | Medium | High | Medium | High |
| Setup time | None | High, mods are highly recommended | None | None |
| Versatility | High | High | Medium | Very Low |
| Automation | With scripts | Full modding | No | No |
| Styles | Console and Arcade | Console (via mods) and Arcade | Arcade | Console |
| Media downloads | From in-game | External sources | External sources | External sources |
| Importing | Built-in | With external tools | With external tools | With external tools |
| Publishing | First-party (Via the workshop) | First-party (Via the website) | Third-party | First-party (Via PSN) |
| Active development | Yes | No | Yes | No |
| Community | Active | Active | Active | Inactive |
| Format | JSON | XML | Propietary binary | Propietary binary |
| Paid | Yes (Comes with Project Heartbeat) | No | No | Yes (Comes with diva F2nd) |
At the time of writing, there are no public tools to convert PH charts to other formats.
Includes learning how to chart in general.
User Manual
This chapter of the Reference has all the information needed to understand the PH Editor, and all its nooks and crannies.
Here, we will discuss:
- How to install the Beta Editor
- How to manage your songs and charts
- How to manage your settings
- How to navigate the Editor
- How to manage the timeline
- How to create and modify notes
- How to place and arrange notes
- How to place Arcade Multinotes
- How to edit angles
- How to import charts from external sources
- And a lot of other use cases and tools
Getting Started
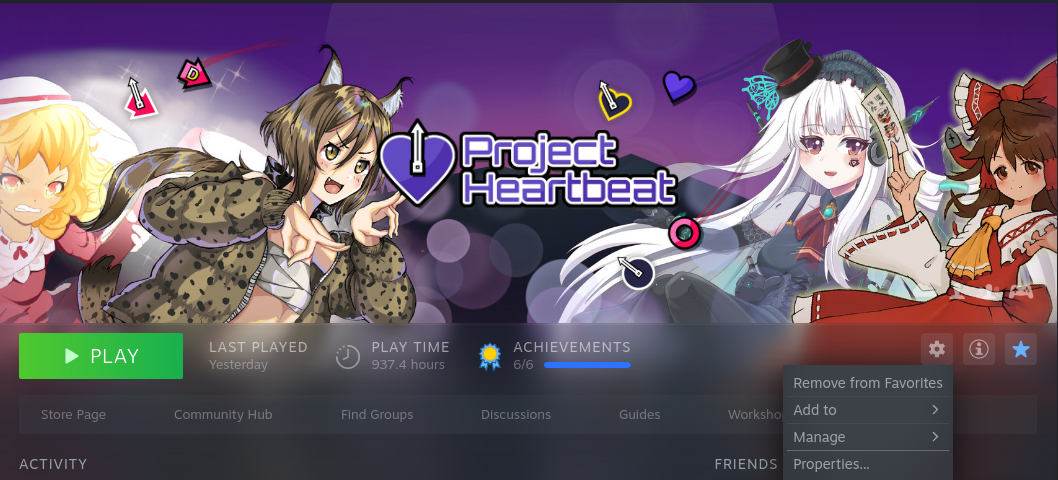
Installing the Beta Editor
The Editor has undergone a lot of major changes recently, and this Reference is written for this new version, commonly called the Beta Editor or the New Editor. To install the beta, first go to the Steam Library page for Project Heartbeat, and then press Manage (The cog icon) -> Properties.
After this, you can go on BETAS and select "beta - Beta branch" on the dropdown:
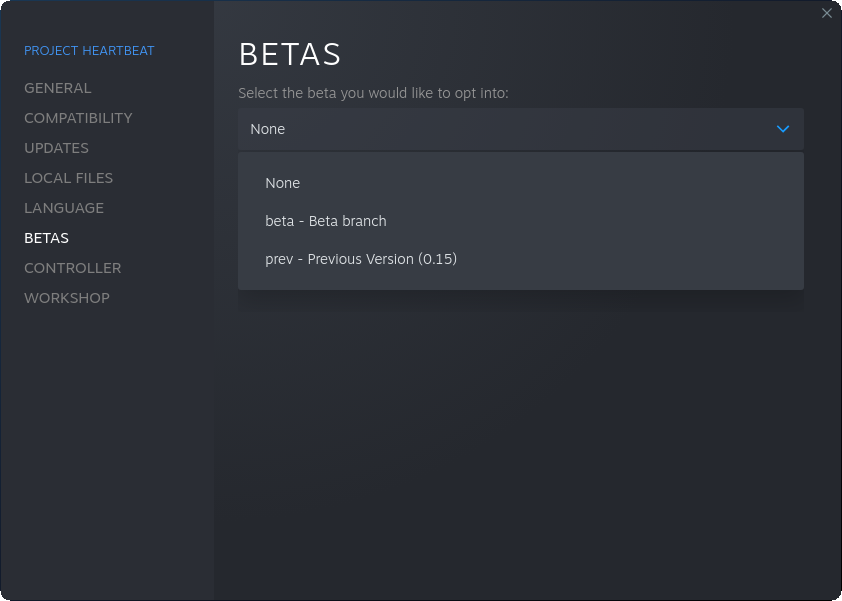
Now you should get an update via steam. Congratulations, you now have the Beta Editor!
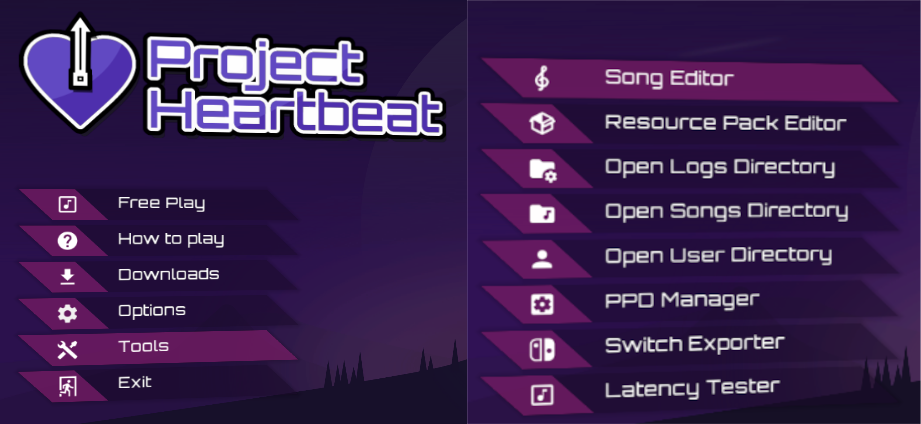
Navigating to the Editor
Once you have the beta installed, you can open the Editor by navigating to Tools -> Song Editor.
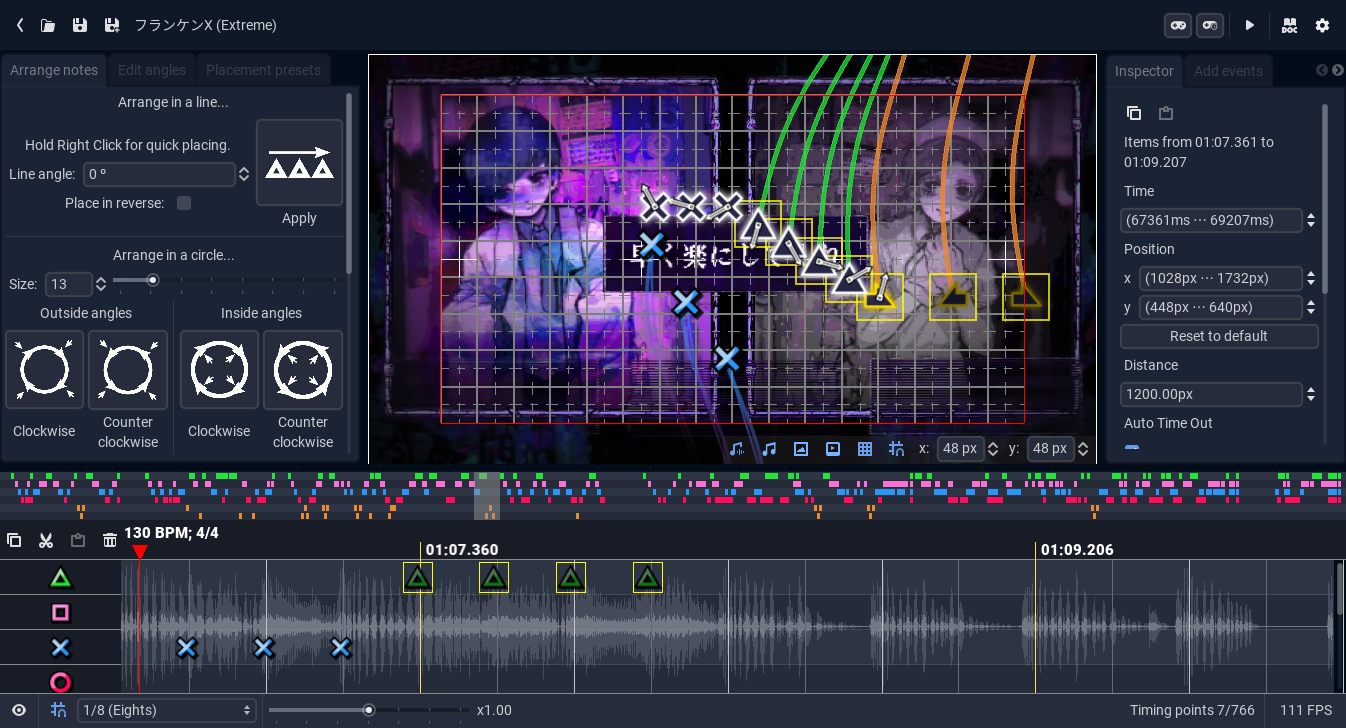
Anatomy of the Editor
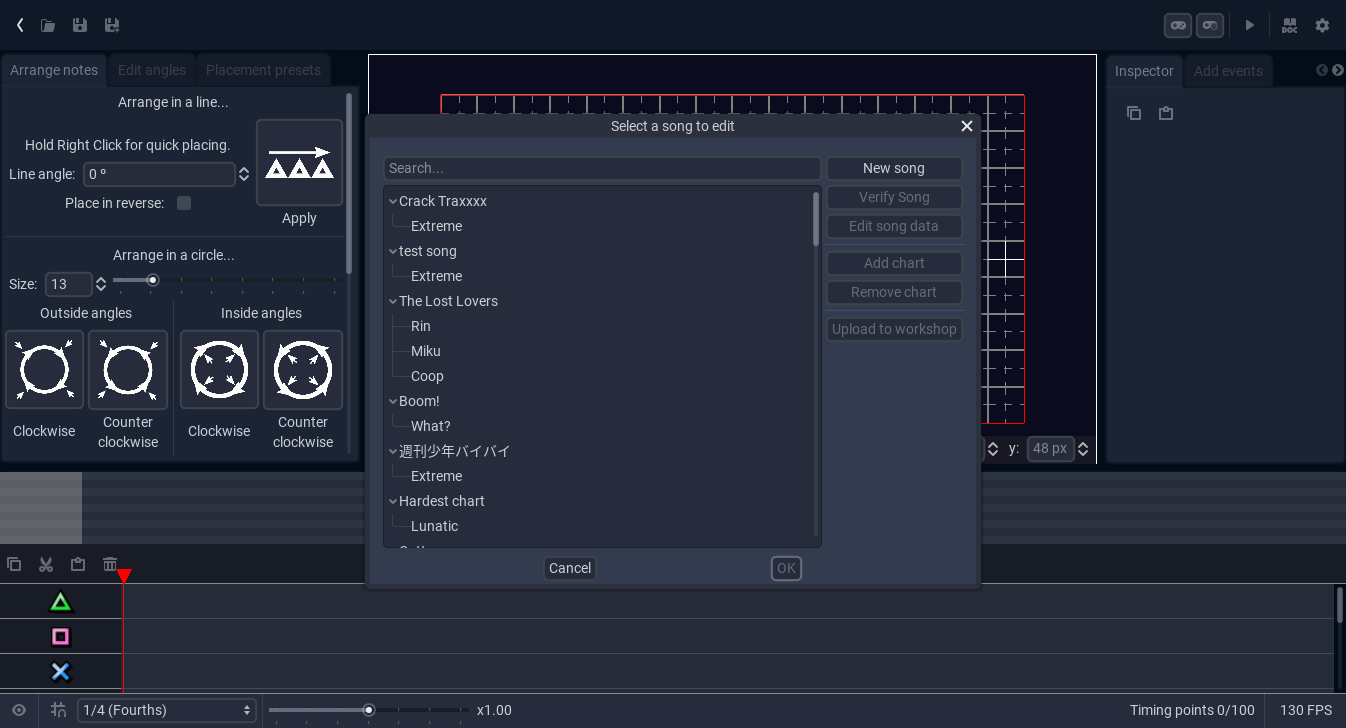
The first thing you will see when you open the editor is the Chart Manager. If you open a chart, then you will be greeted by the main editor window.
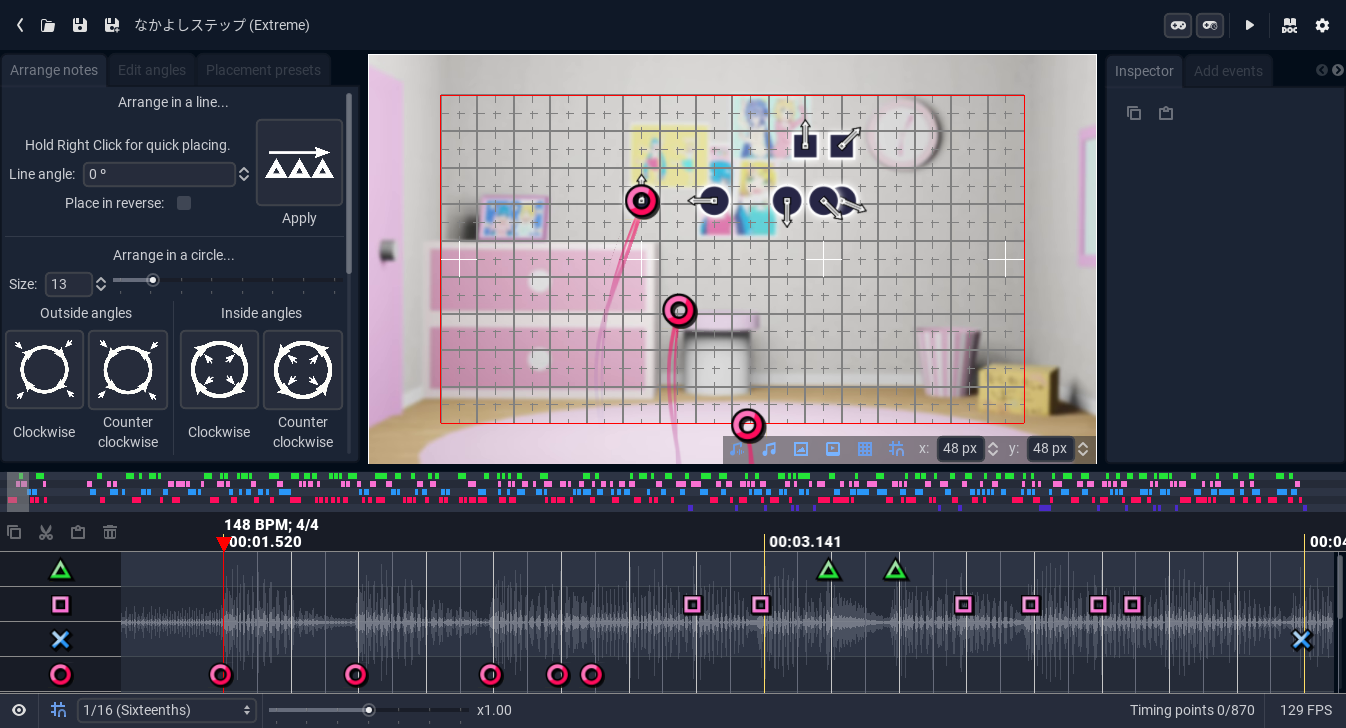
From here, you can see the 5 main areas of the editor:

They are, in order:
- The Top Bar
- The Left Toolbox
- The Preview
- The Right Toolbox
- The Timeline
Inbetween these areas, there are draggable separations. You can resize each part and it will save this layout.
The Top Bar
The Top Bar is composed of 2 sections: The left side and the right side.
The left side

On the left side, we have a few buttons and some info. They are, in order:
- The exit button
- The open chart button
- The save buttons
- The song name
- The difficulty
The right side
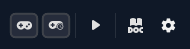
On the right side, we can find, in order:
- The playtest (and playtest at time) buttons
- The preview play/pause button
- The documentation links (which point to this very manual)
- The settings button
The Left Toolbox
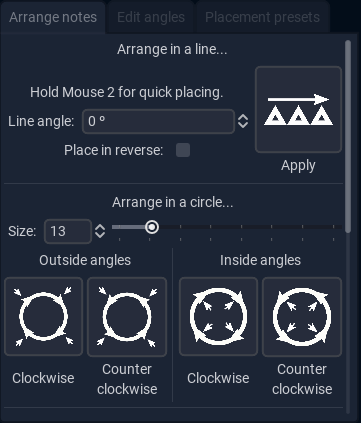
The Left Toolbox is composed of 3 Modules which are responsible for some of the most common operations in the editor. They are, in order:
You can select between them by clicking the corresponding Tab on the top of the toolbox.
The Right Toolbox
The Right Toolbox is also composed by various Modules, which house some less frequently used, but way more powerful tools. They are, in order:
You can also select them by clicking on its corresponding Tab.
The Preview
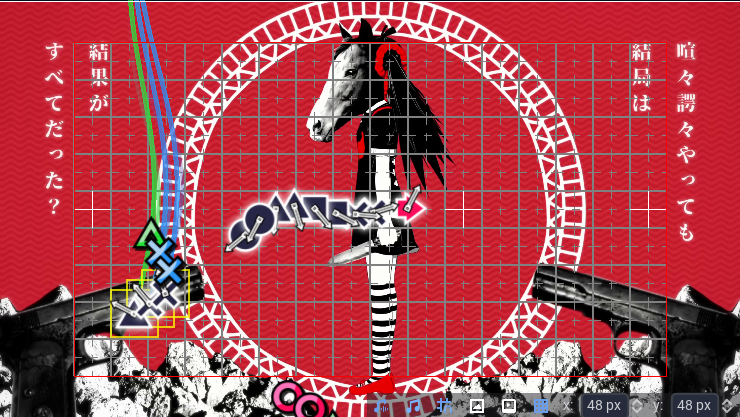
The Chart Preview is one of the most useful tools in the whole Editor. It is what allows us to see, in real time, how our chart will look. It houses various buttons and toggles in its bottom right corner, which are:
It also allows the charter to place and arrange notes, and to edit their angles.
The Timeline

The Timeline is the tool used to look at the chart in full, and managing all of the notes. it is composed of 3 main parts:
The Minimap

The Minimap shows a small view of the whole chart, with a translucent rectangle which can be used to quickly move through the chart.
The Layers

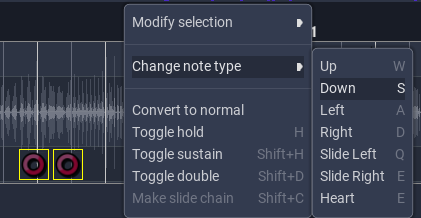
This is the main Timeline view. You can use it to create notes, select them or cut, copy and paste them. It also allows you to see and edit the tempo map, and a variety of other operations through the contextual menu.
The Footer
The Timeline Footer is divided in 2 parts: The left side and the right side.

The left side contains a button to open the layer manager, a button to toggle timeline snap, a dropdown to select a timeline resolution and the speed slider.

The right side contains a note counter, and an FPS counter.
The different controls
The editor is primarily made up of some basic control nodes, which have some special properties. They are:
- Buttons: These have a hint when you hover over them, which contains some help on how to use it and the corresponding shortcut
- Toggle Buttons: These are Buttons that conserve their state, so instead of pressing them you can toggle them on and off. When a Toggle Button is white, it means that its Off, and when its light blue its On.
- Line Edits: These allow you to input a single line of text. Pressing Enter will accept the changes, and pressing Esc or pressing outside of the control will reject them.
- Spinboxes: They are like Line Edits, but they only allow numerical values. You can also run expressions on them. They may impose some bounds on the values you input. They also have some arrows to increase and decrease the values.
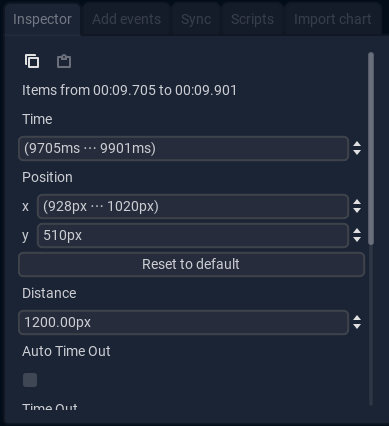
- Multi Spinboxes: These work similarly to Spinboxes, but have some extra features to work with multiple values at once. You can read more about them here.
- Text Edits: This works like a Line Edit, but it allows you to input multiple lines. Therefore, Enter will just add a new line.
- Code Edits: These are like Text Edits, but they have syntax highligthing for scripts and a miniature version of the code on the right.
- Spinboxes: They are like Line Edits, but they only allow numerical values. You can also run expressions on them. They may impose some bounds on the values you input. They also have some arrows to increase and decrease the values.
The Chart Manager
Managing Charts
Managing Songs
Verifying and Uploading Songs
Saving and Auto-Saving
Settings and their Managers
Per-Song Settings
Per-Song Settings
Shortcuts
The Editor has a very extensive list of Keyboard Shortcuts, which can be used to do common operations very fast, increasing productivity. There is a shortcut for almost every button in the editor, alltough not all of them are set by default. Shortcuts are in no way mandatory, and a lot of the things you can do with them have manual versions. This said, it is very useful to learn at least the ones for the things you do most commonly.
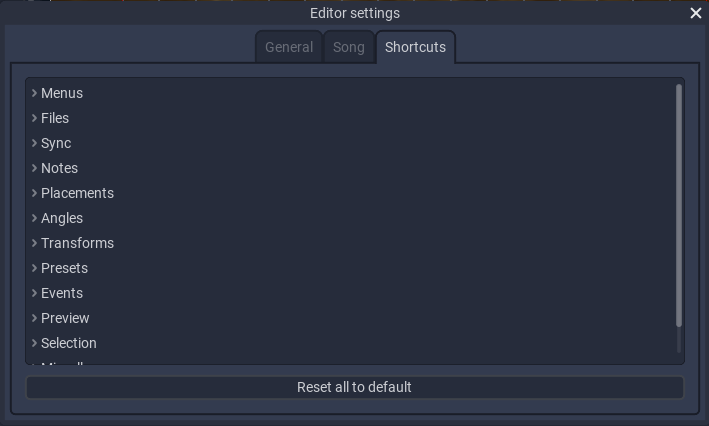
The Shortcuts Manager
In the settings tab lies the Shortcut Manager, which is used to view and edit shortcuts. In it, you will see a list of all the categories, which you can open to reveal the list of shortcuts, alongside of a brief description of what they do. You will also see a button to reset all shortcuts.
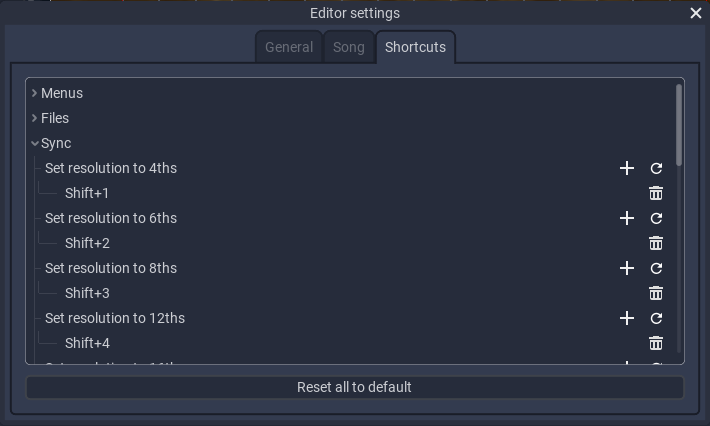
Each entry corresponds to an action, and it has the name of the action in the top row. Below it there is a list of all the shortcuts that are assigned to this action.

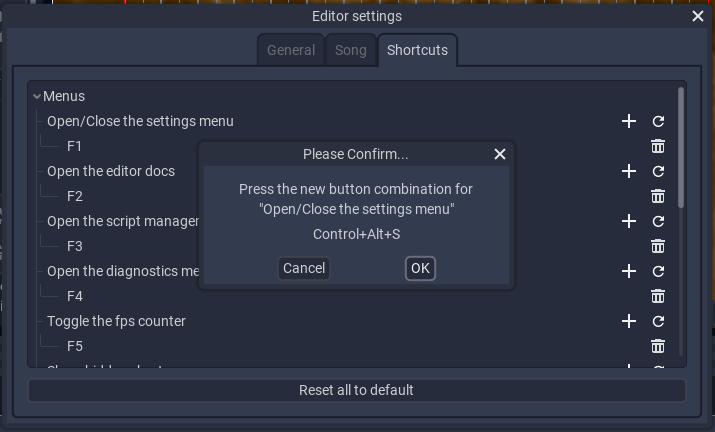
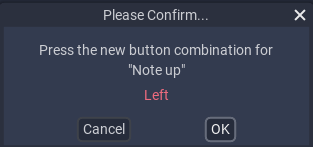
Pressing the plus icon will open a dialog to add a new shortcut to this action. Double clicking on an assigned shortcut will open a similar dialog to edit it. You can press any key combination or mouse button to set the new shortcut. Once you are done, press OK.
The valid types of shortcuts are:
- A key
- A mouse button (wheel up/down counts)1
- One of the above, combined with one or more of Control, Shift, Alt or Meta (The windows key on most keyboards)
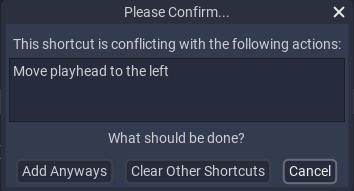
If you assign the same shortcut to 2 different actions, the text will be red2.
If you still want to proceed, it will let you choose between adding the shortcut anyways, removing the binding from other actions and going back.
Pressing the trash icon will remove the selected shortcut, and pressing the reset icon will reset this action to its default mapping.
The Shortcut Map
There are a lot of default bindings in the editor. Here, you can navigate a map of them, to familiarize yourself with their usage. Keep in mind that not knowing every single one of these is in no way a problem when charting, but this reference is useful even if you dont use most of them.
To navigate the map, hover over a key, which will show a tooltip with the action it corresponds to. You can also click on the modifier keys (or hold them on your physical keyboard) to show the commands related to them.
You can filter the shortcuts by category by using the dropdown in the left. With the middle textbox you can search shortcuts, and the rightmost icons and dropdown are used to select the shape and layout of the keyboard.
Some actions with originally keyboard-only bindings dont work when setting a mouse binding, and viceversa. We are trying to fix this, so if you find such a case, please report it!
Not all actions conflict with each other. Some actions will never interfere with some others, so they are hard-coded as non-conflicting.